
Before any harness practice, stop for pain or new touch sensitivity and ask your vet. If your dog has growled, snapped or bitten during handling, seek veterinary and qualified reward-based professional help instead of trying this home protocol.
Start with the harness lying on the floor and a few treats scattered around it. Over several short sessions, follow each small harness moment with a treat: the harness coming out, your dog pushing their nose through an opening or stepping into it, the buckle clicking, a few seconds of wearing it. Wherever the style allows, hold the harness still and let your dog move into it, rather than pulling it onto them. Give the treat after each moment, not as a way to keep your dog standing still while you work.
If your dog moves away, release and pause. Let go of the harness or take it off, and stop handling. Try an easier version only if your dog comes back on their own and looks relaxed. If not, end the session.
Check for pain or handling worries before you start
Some dogs avoid a harness because it is new; others because something hurts when straps touch or hands reach under the chest.
Skip harness practice for now and talk to your veterinarian if your dog:
- Has started flinching, yelping or turning to look at you when touched on the neck, chest, shoulders, front legs or belly.
- Is limping, stiff, slow to get up or reluctant to move.
- Licks or chews at one area of their body.
VCA's guide to signs of pain in dogs lists reluctance to get up, lashing out when handled, resenting being brushed and licking or chewing at painful areas among possible signs. None proves pain, but each is a reason to stop and ask.
If your dog has growled, snapped or bitten when someone reached over them, held them or handled their legs, don't use this article as a home protocol. VCA includes growling and lashing out when handled among possible pain signs that need veterinary attention. Ask your vet to assess possible medical causes; a qualified reward-based professional can help you plan after that assessment. Our guide on when to seek professional behavior help explains what to look for.
Keep children out of fitting practice; reaching around a dog's head and chest is close handling for an adult to do.
Choose a harness style your dog can accept
Harnesses go on in different ways, and your dog doesn't have to put their head through an opening if that worries them. Choose the style that needs the handling your dog finds easiest.
Over-the-head harnesses
These have a fixed neck loop. Your dog pushes their head through, then you fasten one or two buckles around the chest behind the front legs.
Step-in harnesses
These lie flat on the floor. Your dog walks their front feet into two openings, then you lift the sides and buckle them over the back. Your dog may need to lift each front foot, and you may need to guide their feet. The Edmonton Humane Society harness guide notes that some dogs are nervous of overhead movement and some of having their legs and feet handled, so a step-in style is not automatically easier.
Harnesses that buckle around the neck
Some harnesses have a buckle on the neck strap as well as the chest strap, so you can wrap the neck strap around your dog's neck and clip it without their head going through a loop. Dogs Trust suggests this kind of alternative for dogs who are a little head-shy. The trade-off is an extra buckle close to your dog's face and ears.
If your dog ducks when your hands pass over their head, try a neck-buckle style. If they pull their feet away when touched, avoid a step-in style.
Check that the harness does not obstruct movement
Dogs Trust advises avoiding harnesses that cross directly in front of the shoulders, and the Edmonton guide says a front-clip harness with a strap straight across the chest restricts shoulder movement. A Y-shaped front, where the straps meet in the middle of the chest and pass on either side of the shoulders, is the common alternative.
Research here is limited. In a small treadmill study of nine dogs in Veterinary Record, both harness types tested reduced shoulder extension compared with no harness, and the design described as non-restrictive did not do better. Treat any "non-restrictive" label as a starting point and watch how your own dog moves, using "Check the fit before your first walk".
Set up your space, treats and hands
Practice indoors in a quiet room with a non-slip floor, such as a rug or carpet. Keep outside doors closed. Leave space all around your dog so they can walk away at any point. Don't corner them, pin them against your legs or hold their collar while you practice.
Use small, soft treats your dog really likes, kept in a pouch at your waist or a bowl on a table beside you. For fastening or adjustment, keep treats in the pouch or bowl so both hands are free; fetch a treat after each handling moment. A treat in your free hand is useful for the voluntary head-entry exercise below, not for keeping your dog still while you fasten straps. Our guide to choosing training rewards can help if ordinary kibble isn't interesting enough.
Sit or kneel on the floor beside your dog, slightly side-on, rather than leaning over them from the front.
Use the manufacturer's sizing guide and adjust the straps roughly before you begin, with the harness off your dog. You will fine-tune the fit once your dog is comfortable wearing it.
Keep sessions to a few minutes and stop while your dog is still keen. Our guide to short dog training sessions explains how to fit practice into your day.
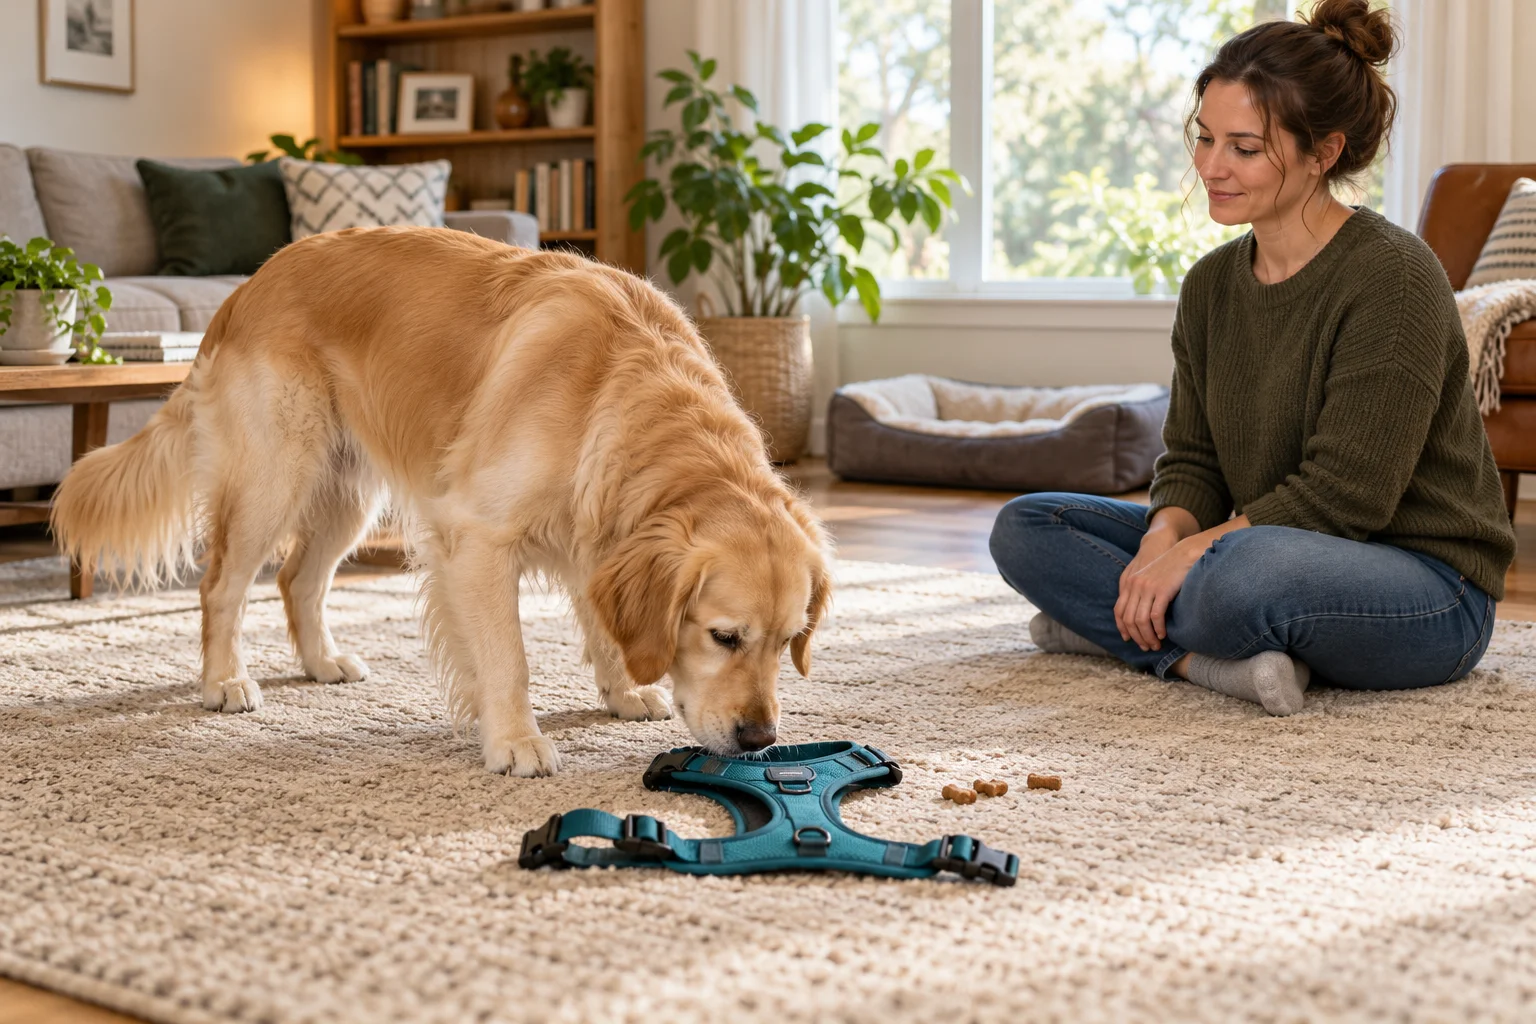
Let your dog explore the harness on the floor
Put the harness on the floor and scatter a few treats around it, as Dogs Trust suggests. Let your dog sniff, step on it and eat the treats.
Next, pick the harness up, hold it at your side, give a treat, then put it out of sight. Repeat a few times, so the harness appearing predicts good things. If your dog has already learned to accept a coat, the pattern will feel familiar; our guide to getting your dog used to wearing a coat covers that, and a harness adds buckles, an opening and a leash clip.
Watch your dog's whole body, not just whether they eat. Taking a treat is not proof that your dog is comfortable. A dog may eat while stiff or leaning away. Look for a loose body, a soft face and a dog who walks toward the harness when it appears. If your dog stops coming over, turns away or moves off, put the harness away and pause.
For over-the-head harnesses: teach voluntary head entry
For other styles, use the matching subsection below.
Hold the harness by the edge of the neck loop in one hand, with the opening upright at your dog's nose height and a little in front of them. Take a treat from your pouch with your other hand, push that hand right through the opening from the back and offer the treat on your dog's side. Dogs Trust describes putting your hand all the way through, so your dog doesn't need to put their head in yet. Your dog eats from your hand; the loop simply sits around your wrist.
When your dog comes to the opening readily, keep the harness still and hold the treat just behind the loop, so your dog has to push their nose through to reach it. Over the following repetitions, hold the treat a little farther back, so a nose-poke becomes a muzzle, then a whole head, through the loop. Your dog moves into the harness; the harness does not move onto your dog. Each time, give the treat, then let your dog back out of the loop on their own.
When your dog is putting their head through without hesitating, let the loop rest on their neck for a second as they eat, then lift it gently forward and off. Give another treat once it is off. If your dog ducks, backs out or turns away, take the harness away and pause. Resume only if your dog returns relaxed, and make the next attempt easier, for example by holding the treat closer to the opening.
When your dog readily puts their head through, offer the same still opening with your guiding hand empty. Reward from your pouch after voluntary entry, then let your dog back out. Fade the visible lure, not the rewards. If your dog hesitates, lower the harness and pause; offer an easier version only after a relaxed voluntary return, otherwise end.
For a step-in harness: let your dog walk into it
Lay the harness flat on the non-slip floor, opened out into its shape. Place a treat just beyond it so your dog walks across the harness to reach it. Reward any front foot landing in or beside an opening. Once your dog walks across it easily, place the treat so their front feet are more likely to land in the openings. If a foot needs placing, first touch the leg briefly and give a treat. When that is easy, lift the foot just enough to place it in the opening, then give a treat. If your dog pulls a foot away, release it and pause, and continue only if they return relaxed. For dogs who dislike foot handling, our guide to a dog who won't let you wipe their paws explains a gradual approach.
For a harness that buckles around the neck
Hold the open neck strap still at your dog's chest height and let them sniff it, then give a treat. When they stay relaxed, lay the strap loosely around the front of their neck for a second, without fastening it. Give a treat and take the strap away. Then practice closing the strap, giving a treat and opening it again, using the buckle practice below.
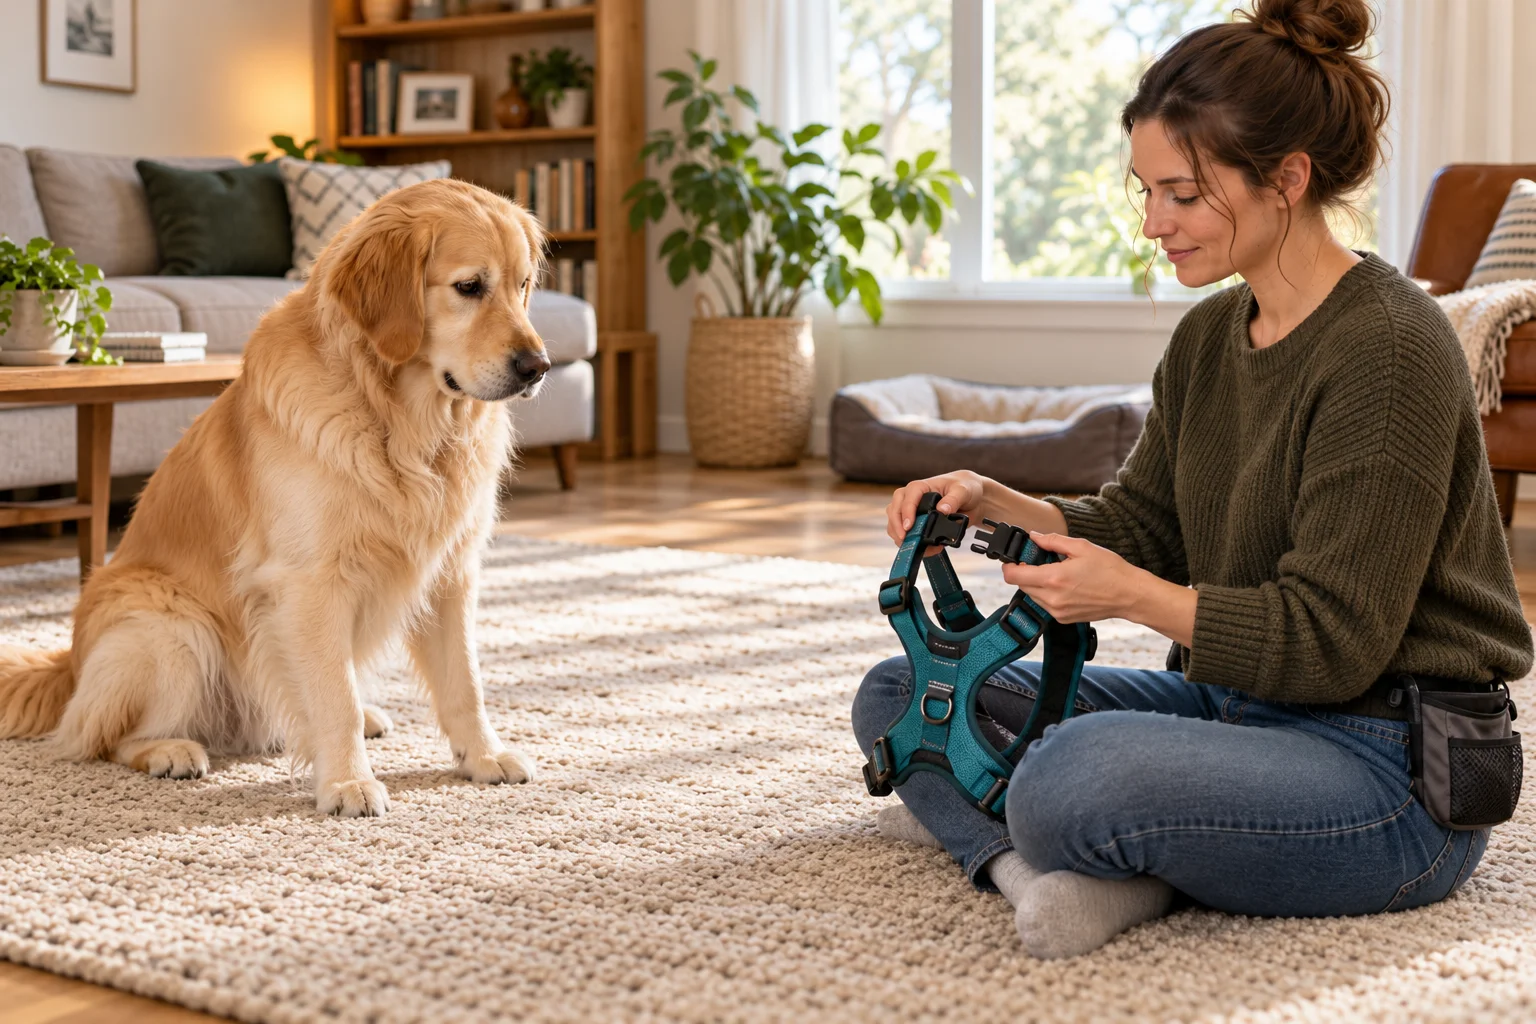
Get your dog used to the buckle click and fastening
Practice the click away from your dog first. With the harness in your hands and not on your dog, clip and unclip the buckle, then give a treat after each click. Dogs Trust and the Langford Vets handout both include this stage. Start a few feet away from your dog if they flinch at the sound, and close the buckle slowly to soften it. Move closer when your dog looks toward you expectantly at the click rather than startling.
Next, rehearse the strap movement for your style, rewarding after each small movement and removing the harness. For over-the-head or neck-buckle styles, touch the loose chest strap to the side, then gradually bring it under the chest. For a step-in style, gradually lift the sides toward the fastening point over the back. Follow your model's instructions rather than passing a step-in buckle under the chest. Langford Vets' harness training handout separates getting the dog used to the straps moving from doing them up.
When your dog stays relaxed through that movement, fasten the buckle at your model's intended position: usually beside the chest for an over-the-head style, over the back for a step-in, and at the neck and chest for a neck-buckle style. Hold the ends with both hands and keep skin and fur clear of the closing clip; do not force a finger into the closing mechanism. Give a treat right after the click, then unclip and take the harness off. Give one more treat once it is off.
Don't hold a lick mat or ask a helper to keep feeding while you work the buckle. Food that keeps a dog standing still can hide the moment they would have walked away.
If your dog moves away during fastening, let go of the strap. If the harness is half on, unclip anything you have fastened and lift it off. Pause, and only continue if your dog returns relaxed.
Take the harness off calmly
A dog startled by a harness coming off may start avoiding it going on, so practice removal as carefully as fitting. Unclip each buckle with your fingers between the clip and your dog's body. For an over-the-head harness, hold the neck loop open wide with both hands and lift it forward and off, keeping it clear of the ears and eyes. Alternatively, hold it still and let your dog back their head out. For a step-in harness, unclip it over the back and let your dog walk out of the openings. For a neck-buckle style, unclip the neck and chest straps and slide it off to one side.
Give a treat once the harness is off. Don't drag it over your dog's head or hold them still while you work on a stiff clip. If a buckle sticks, stop tugging and pause. Retry gentle removal only while your dog is relaxed and willingly staying; if they withdraw, stop handling. Seek help promptly if you cannot remove it without force or your dog is distressed.
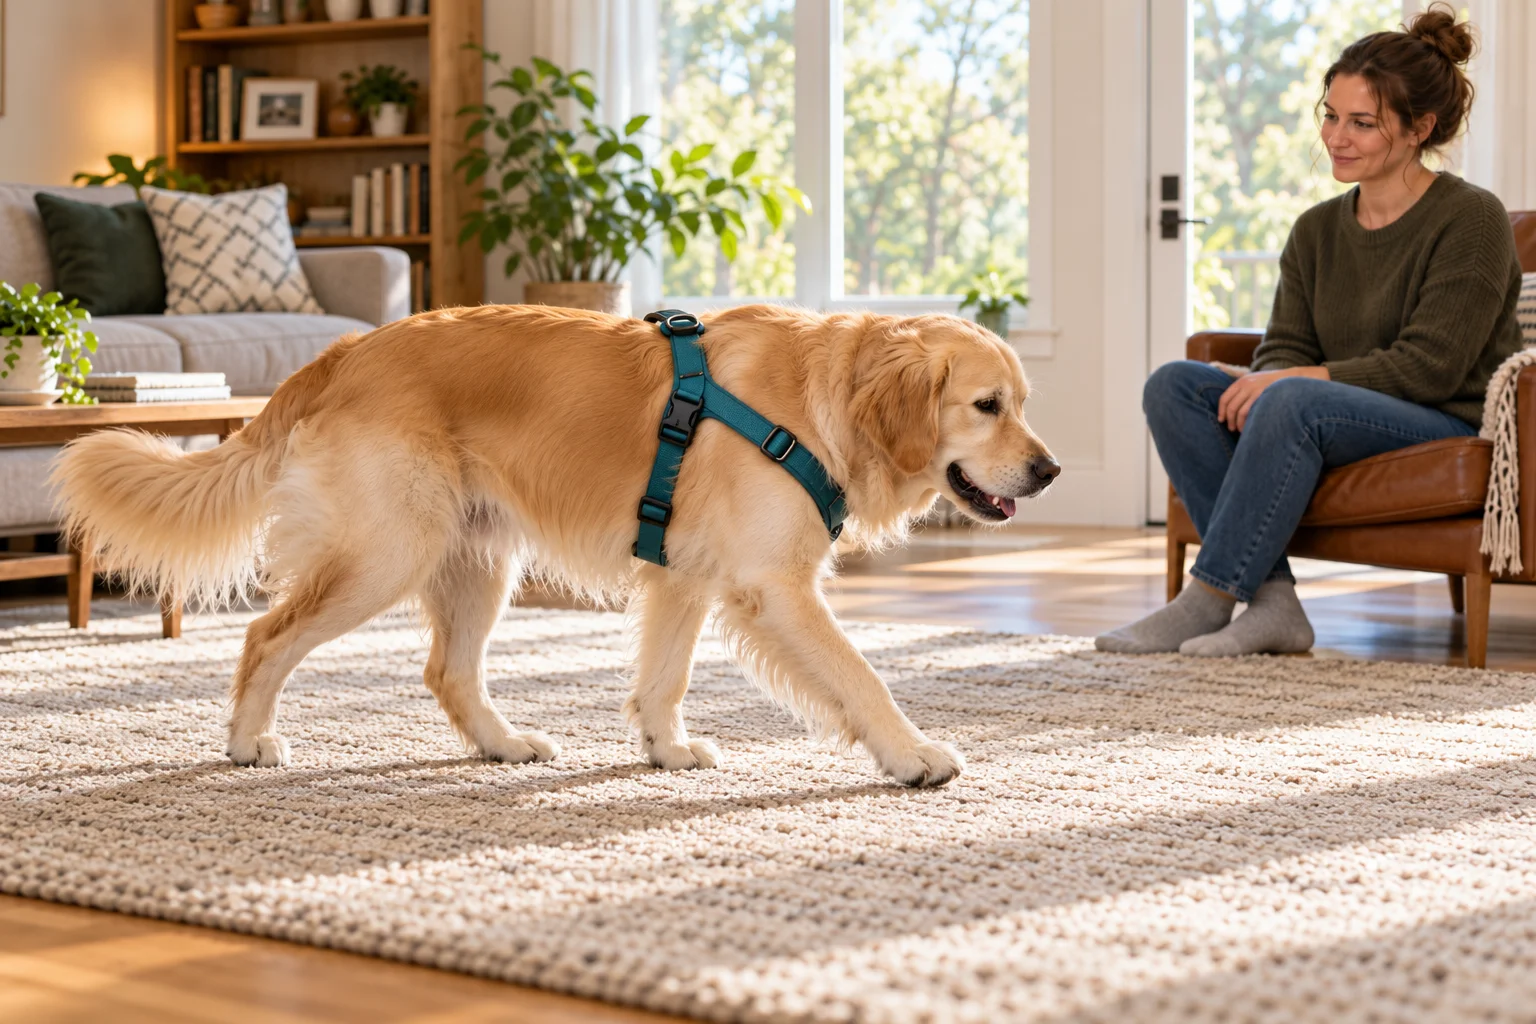
Build up wearing time indoors
Once your dog is comfortable having the harness fastened and taken off, start leaving it on for longer. The Langford Vets handout describes adding time in very small amounts, as little as a second at a time, until the dog is comfortable wearing it for a few minutes.
While your dog wears it, scatter a few treats on the floor so they walk around, play a gentle game or practice a cue they already enjoy, as Dogs Trust suggests. Then take the harness off before your dog shows signs of wanting it off, and give a treat once it is removed.
Increase the time only when your dog is moving normally in the harness: walking with an ordinary stride, sniffing, turning, lying down without fuss, and still coming to you when the harness appears. There is no fixed number of days or sessions.
The same stop rule applies to wearing time. If your dog scratches at the harness, rolls, freezes, walks with an unusually short stride or moves away from you, take it off and pause. Next time, try a shorter wearing time. If any of those reactions continues once the harness is off, see "Watch for rubbing, sore spots and changes in movement".
Check the fit before your first walk
Do the detailed fit check once your dog is relaxed wearing the harness, because it involves extra touching. Work through it in short pieces, with a treat after each check.
Follow your harness manufacturer's fitting instructions and check under every strap for a snug fit without digging in. The Edmonton Humane Society harness guide covers checking fit and movement; Dogs Trust's harness advice also stresses a fit that does not shift or let the dog slip out. Use those practical checks together, not a finger count alone.
Check behind the front legs. The Edmonton guide says straps around the belly shouldn't rub or chafe at the armpits or elbows. Make sure the chest strap sits a little way behind the elbows, not pressed into them.
Check that it stays put. Dogs Trust says the harness shouldn't shift position as your dog moves and your dog shouldn't be able to slip out of it. Then watch your dog walk across the room from the side and from behind. Look for an ordinary stride and nothing pressing into the front of the shoulders or the throat. Adjust anything that digs in.
The Edmonton guide also recommends checking regularly for frayed fabric and cracked plastic buckles. If your dog's ID tag is on their collar, keep the collar on too.
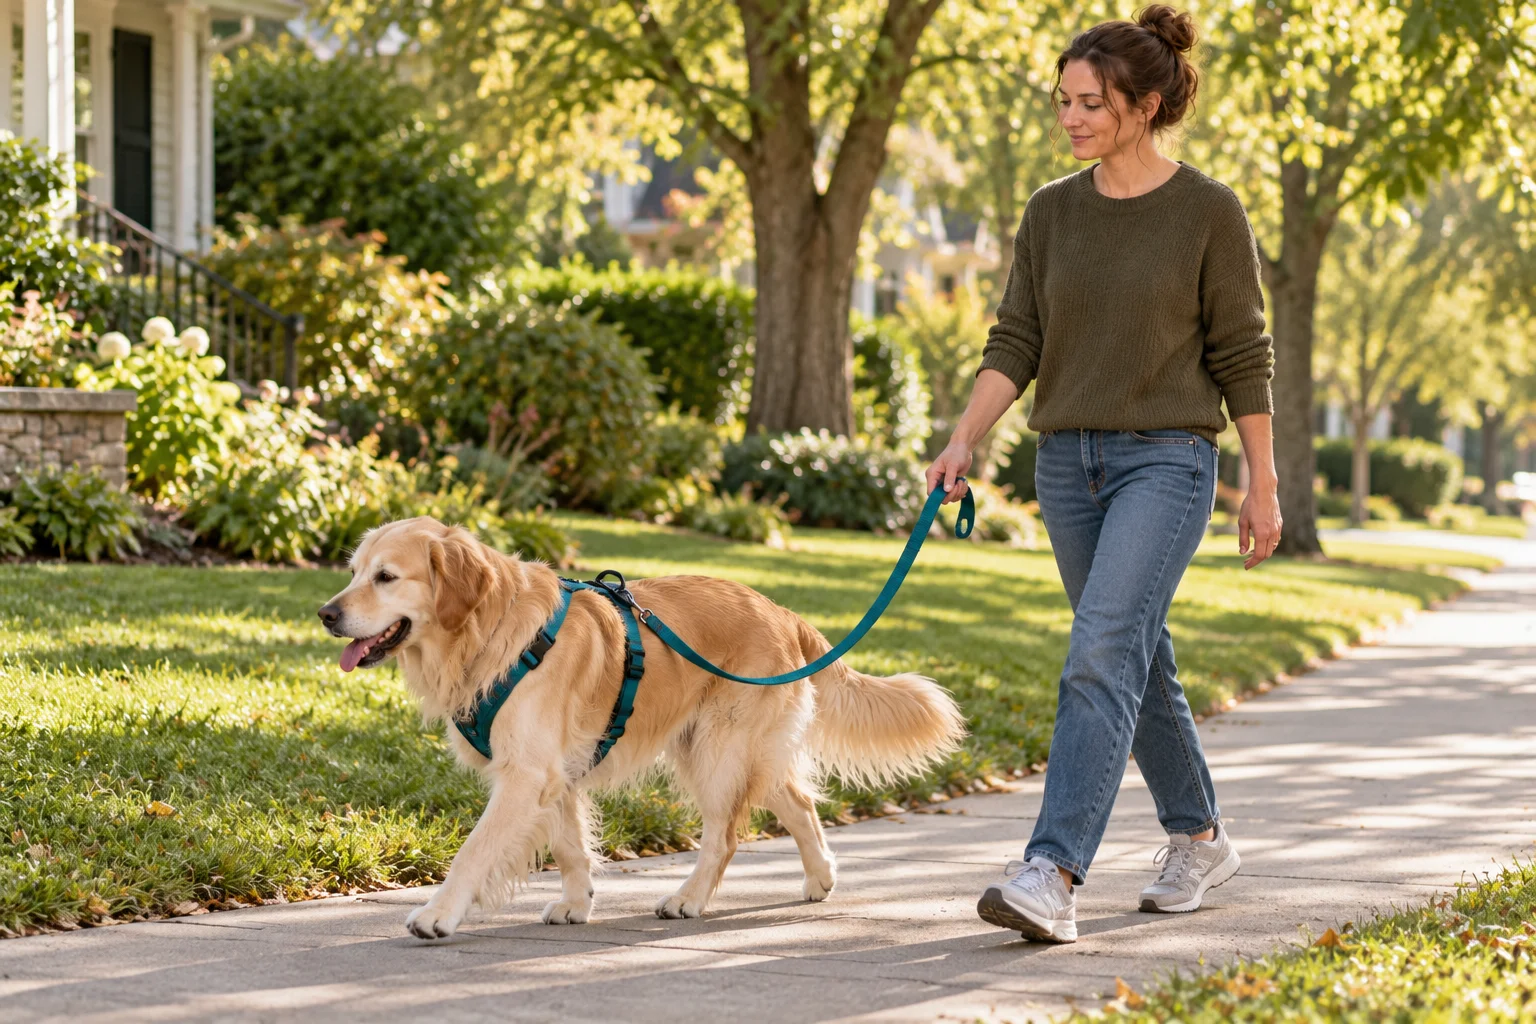
Clip on the leash and start short walks
Practice the leash clip indoors with outside doors closed first. Hold the leash in one hand and clip it to the harness ring with the other, then take a treat from your pouch with that free hand and give it. Let the leash hang slack. The Langford Vets handout is clear at this stage: don't move or pull on the leash. Unclip it after a few seconds and give another treat.
Then walk around the room with the leash slack, keeping it in one hand and giving a treat with the other. When your dog walks easily beside you indoors, take a short, easy walk in the yard or along a quiet stretch of sidewalk. Keep the leash loose, give a treat when your dog walks comfortably beside you and come home before they tire. Our guide on why your dog listens at home but not outside explains why a new place can feel like a new exercise.
A harness doesn't teach walking manners by itself. The Edmonton guide says loose leash walking is a learned skill and must be taught, even with a front-clip harness. Our guide to loose leash walking covers how to teach it.
Manage necessary walks while harness training continues
Keep the outings your dog needs separate from harness practice, so you never have to rush it.
For walks your dog needs today, use equipment they already accept. That might be their usual well-fitted collar and leash, as long as they don't pull hard against it and your vet hasn't advised against a collar for them. Short trips to the yard can cover bathroom breaks.
If your dog pulls strongly against a collar, or your vet has advised against one, ask your vet or a reward-based trainer what to use while harness training continues. Don't rush the harness on before a needed walk or hold your dog still to get it on; that can undo several calm sessions.
If your dog is uneasy with their collar too, our guide to getting your dog comfortable with you holding their collar covers collar handling as a separate skill.
Watch for rubbing, sore spots and changes in movement
After each walk, while you take the harness off, look at the places straps touch: behind the front legs, the chest, the sides and the back of the neck. Watch for redness, hair loss, broken skin, a damp patch from licking, or your dog licking or chewing at a strap line.
If you find rubbing, stop using the harness. Recheck the fit before you try it again, and talk to your vet about any broken or sore skin. A different size or shape may help, but don't keep walking in a harness that has already rubbed.
Watch movement as well. Shortened strides, a hop or skip in the front legs, reluctance to walk, or a dog who walks normally without the harness but oddly in it can suggest the harness is pressing or restricting. Take it off and check the fit. If the odd movement continues without the harness, or your dog seems sore when touched, see your vet before more harness practice.
Fix common harness problems
Your dog backs away when the harness appears
Put it out of sight and pause immediately. Offer the easier floor-exploration stage only if your dog comes back voluntarily with a relaxed body. Otherwise end the session; do not leave the harness out to keep trying after withdrawal.
Your dog ducks or turns their head away from the opening
Take the harness away and pause. If your dog returns relaxed, go back to holding the loop low, at nose height, with your hand all the way through. Some dogs never get comfortable with a loop passing over their head, and a step-in or neck-buckle style is a reasonable permanent choice.
For example, a dog might push his nose through the loop happily but duck back as the loop passes his eyes. His owner lowers the harness and pauses. The dog comes back and sniffs the harness with a loose body, so the owner holds the treat just behind the opening again and rewards the nose-poke. Over the next sessions, the dog starts pushing his nose through as soon as the harness appears at his nose height, with a loose body and no hesitation, so his owner holds the treat a little farther back. If the ducking had continued, a neck-buckle harness would have been the next choice.
Your dog mouths the harness or your hands
Stop handling, let go of the harness and pause. Return only if your dog comes back relaxed, and try an easier stage. If your dog's teeth press hard on your hand, or they growl or snap, end the session and seek help using the boundaries in "Check for pain or handling worries before you start".
Your dog freezes or walks oddly in the harness
Don't use treats to coax a frozen dog forward. Unclip the harness, take it off and give a treat once it is off. Check the fit, then shorten the wearing time. A dog who stays stiff, keeps walking oddly or shows any of the signs under "Watch for rubbing, sore spots and changes in movement" needs a vet check, not more wearing time.
Your dog is relaxed indoors but stops at the front door
Clip the leash on indoors, then practice wearing the harness in the yard or on the doorstep before longer walks. Keep the leash slack and the outing short, and give a treat when your dog walks forward comfortably. If your dog stops or looks worried, wait without pulling. If they still won't move forward, go back inside, take the harness off and make the next attempt shorter.
The harness slips or your dog backs out of it
Recheck the strap lengths using "Check the fit before your first walk". If it still slips, try a different size or shape rather than tightening it beyond a comfortable fit. Until it fits securely, practice only indoors with outside doors closed.